
Every factories follows some sequence of operations for the production of garments. Here we will discuss on the processing steps briefly that will help you to understand the production processes as a merchandiser. Before starting production factory in-house the fabric, accessories, threads etc. After fabric in-house in the fabric store, fabric is inspected in rotary fabric inspection m/c. It is done by 4-point system. Marker making is done by CAM/CAD Software or manually. Then marker is checked by the Q.I.
Following are the production processes which are done accordingly:
- Sampling
- Fabric, accessories, threads In-house
- Fabric Inspection
- Fabric & accessories Testing (Shrinkage test, Nickel test etc)
- Pattern Design& Marker making
- Fabric cutting
- Sewing
- Washing
- Finishing
- Packing
- Shipment
Sampling:
After getting order, sample is submitted to the buyer. If buyer approves the sample, then production starts. Different types of samples are made for buyer approval& production running. Different types of samples are made at different stage of production. It takes several days to complete sampling process. Sample Garments making is to be done by a very efficient & technically sound person. Here every man can complete full garments. For quick Production sometimes they works as a groups for producing single garments.
Fabric, Accessories, Threads in-house:
Fabric, accessories, threads are ordered to the supplier after getting approval of these from Buyer. Fabric, accessories, threads are in housed in store.
Fabric ordering, Receiving & Supply system are given below:
Store received the fabric according to packing list
↓
Store prepares the inventory report
↓
Make blanket for checking shade and shrinkage test
↓
Inspect the fabric
Fabric & Accessories Testing:
Shrinkage test:
Shrinkage test means the test of fabric increase or decrease percentage after wash. For shrinkage test first cut a blanket from the roll in 22 inches length. From this blanket 50% cut separately and remarks 50cm Length and 50cm width. Then wash this blanket and measure this blanket by measuring scale, and measure the shrinkage of the fabric.
Nickel test:
This test is carried out to identify nickel is present or not in metal items like button because it is very harmful for soft skin. To carry out this test, two drop of Di-methyl glyoxime& two drop of ammonia is taken in a Cotton Buts. Then rubbing is made with cotton buts on metal items for 30 seconds. If cotton buts color becomes pink then nickel is present. Otherwise nickel is not present.
Fabric Inspection:
- Fabric inspection is done by using the 4 point system on the Rotary fabric inspection machine.
- Records are maintained for every fabric invoice packing list and inspection report. Fabric inspection forms have the defects classified separately. E.g.:- Stains, Weaving defects, Stick mark ,Missing yarn, Thick yarn, Slubs, Knot, Join, End out, Spot, Hole etc
- Review the packing list and determine how much total fabric to inspect and determine how many rolls of each color to inspect.
- Accepts penalty point up to 20 points per 100 square yds.
- 10 % of all stored fabrics are inspected prior to cutting.
- If 10% of fabric inspection is failed then another 10% is inspected.
- If it is failed then 100% fabric is inspected.
- The Four Point system classifies defects as shown in Table:
Table: Four Point System:
| S/l. No. | Size of defect | Penalty points
|
| 01 | 3 Inches or Less | 1 Point |
| 02 | Over 3, But not over 6 Inches | 2 Points |
| 03 | Over 6, But not over 9 Inches | 3 Points |
| 04 | Over 9 Inches | 4 Points |
- Points per 100 square yds is calculated by the formula:
Points per 100 square yds= (Total points in roll * 36 * 100)/ (Fabric length in yards * Fabric width in inches)
- Ensure that the no. of roll is accurate listed in packing list.
- Penalty point up to 28points per 100 square yds is accepted.
- Then together blanket & shade segregation is done.
Pattern Design & Marker making:
Pattern Design:
- Pattern is a different part of a body which is made by the hard paper on behalf of fabric. This cut is complete by the marking on a paper.
- “CAD/CAM system for pattern design.
- It shows the measurement of different parts of garments.
- At first pattern master designs the Pattern on CAD / CAM system by using measurement chart.
- Grading is also done by here.
- The CAD department makes pattern by CAM/ CAD according to the buyer measurement sketch graphs
Marker making:
- Marker is a graphical presentation of a complete body \ garments.
- Its gives our guide line how can you cut the different parts of garments.
- It gives you basic idea about the different parts of garments.
- It gives you clear idea about different angel, curve and corner. Pattern cutting started from the marker graph.
- Software shows details information about Fabric consumption.
- Fabric consumption is calculated automatically considering the no. of garments, efficiency of marker, Shrinkage, cut able width of the fabric, length etc.
- There is a marker man, who prepares the marker paper using CAD making software.
- Then the print it by printer and supply it to the sample department.
- Sample department prepare sample according to the marker. After washing the sample taking the approval from buyer they certified that it is okay.
- Then the CAD department prints the final marker and provides it to the cutting department.
- Cutting department see the marker and numbering the different parts and take the action for cutting fabric lay.
- To prepare a marker the marker man considers some issue.
– Buyers instruction.
– Buyers measurement.
– Fabric shade.
– Fabric shrinkage.
– Minimum wastage of fabric.
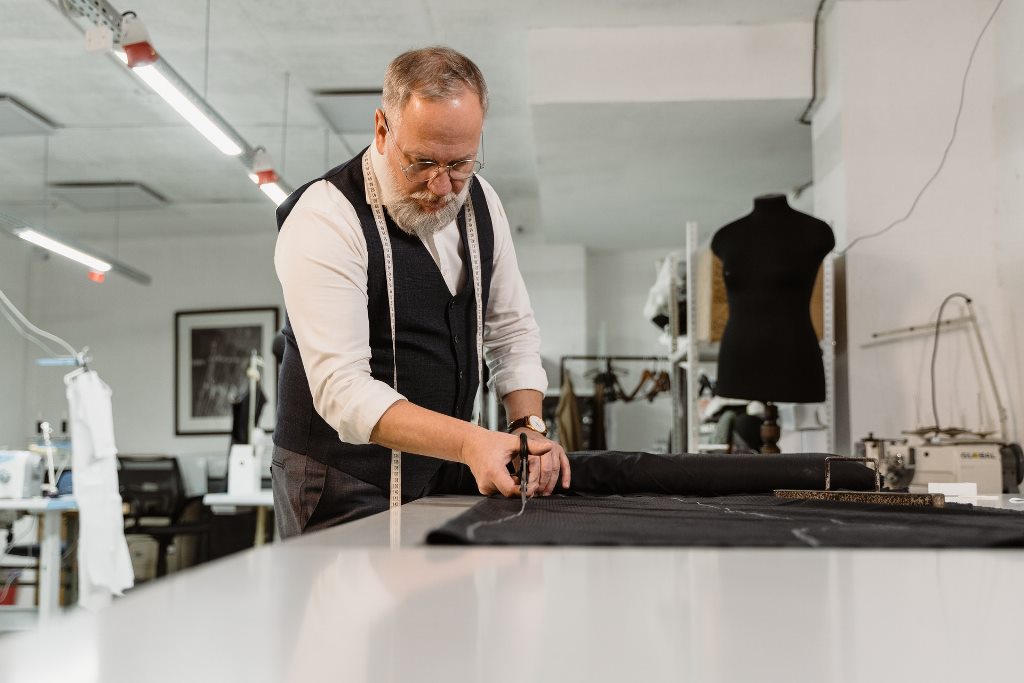
Fabric cutting:
Cutting section operations are given below:
Operations:
- All cutting machine operators use metal hands gloves while cutting to avoid cut injury on the finger.
- All cutting department employees use dust mask while cutting to avoid breathing in cutting dust.
- Before starting the size set cutting process, all reports and tests are completed on the fabric to be cut.
- The size set cutting process is based on the findings from these reports:
- Fabric Inspection Report
- Shrinkage Report
- Blanket Report
- Shade Band Report
- To confirm the shading the fabric is joined side to side, side to middle and front to end and compared for color variation, if all is ok then size set cutting process should proceed.
- Before and after wash swatch boards made for all approved fabric swatches with all kinds of parts (body fabric, pocketing, binding, inside w/band etc. These must be matched under buyer approved light box before wash & after wash
- All lay/cuts are inspected prior to cutting. The following points that will need to be checked:
- Marker Length
- Marker Placement
- GSM
- Tension
- Leaning
- End
- Total defects found and actions taken towards the defects are noted.
- After cutting the parts, they need to be checked with hard pattern to see if there is any variation between the pattern and cut parts.
- Cutting layer should be selected from one dye lot however if mixed dye lot needs to be used then paper lay must be placed with correct identification information between each dye lot.
- Cutting table needs to be always clean. If there is any damage on the tables, they need to be repaired immediately.
- After cutting is complete parts numbering needs be 100 percent accurate for all the cutting parts to avoid size and shading problem on the sewing floor.
- All cuts must be inspected prior to issue in the line. All cut parts (Top / Middle and Bottom) must be inspected from each layer and recorded. This record includes the name of the component inspected. Variation found (Actual compared with paper pattern) and the action taken towards the defects.
Cutting operation sequence:
FABRIC RECEIVE
↓
MARKER CHEKING
↓
FABRIC LAYING/SPREADING
↓
CUTTING
↓
CUTTING INSPECTION
↓
NUMBERING
↓
BUNDLING
↓
SUPPLY TO SEWING SECTION
Sewing:
Sewing section activities are unlimited. Here most common activities are shown below.
- Size set Sample
- Pattern collection
- Styling check
- Measurement check (Before and After wash)
- Pattern check
- Pilot or initial run
- Bulk swing permeation taking.
- Pre production meeting
- Sewing in line
- Accessories check
- Product wash
- Pre final check (non wash product)
- Factory audit
- Sewing
- In process check
- Primary thread cutting
- Button attach according to the style
- In process report
- In line report
- Walter percentage report
- Lay out check
- Six pieces report
- Machine stop’s report
- Output ISO report
- Daily Output report.
- Arrange and decorating line etc.
Washing:
The technology which is used to modify the appearance, size, color, outlook, comfortability, design, fashion, etc. of the garments and given old look garments effect which can not possible in any other
method is called garments washing.
The General Production Process of washing is given below –
Store → Washing Manager →Washing In Charge → Dyeing Master →Dry Pocess →Wet Process → dyeing→ Shade Matching→ Hydro Extracting →Drying →Shade Matching →Store
Washing is the operation act as textile finishing operation which may be mechanical or chemical. The processing sequence depends on the style, Buyer requirements, sampling process etc. different processing sequences are followed for different style.
Different wash processes are done. They are-
| Wet Process | Dry process |
| Normal wash | Hand Sanding |
| Caustic wash | Whisker |
| Pigment wash | Wrinkle(3D Effect) |
| Enzyme wash | Grinding and Destroy |
| Bleach wash | Tagging |
| Stone wash | P.P spray |
| Stone bleach washes | Laser |
| Stone enzyme wash | Ozone |
| Tieing | |
| Acid wash | |
| Bleach Towel | |
| Tinting |

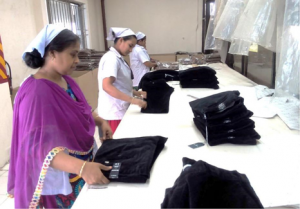
Finishing:
There is several numbers of activities done by finishing section. It depends on style to style. The finishing section common activities are shown below by a lay out in numerical chronological order-
- Loop cutting: It is the first step of finish9ing section. When the garments come from wash the finishing helper cut the extra part of west belt loop.
- Label pole bag cut: Then the helper cut out the label protection pole bag.
- Pocketing thread cutting: Cut the excess parts of thread from pocketing.
- Thread cutting from inside of garments.
- Top side thread cutting.
- In side quality check: In this step the quality controller check step by step.
- Front part.
- Back part
- Sid seam.
- Top side Quality Check: Step by step
- West belt check
- Front part check
- Back part check
- Sid seam check
- Ham check
- West belt elastic joint if required.
- Then joint loop
- Loop bar take AAL& AFL Finishing section
- Button adjust
- Getup check: In this step the quality table checks some process.
- West belt measurement
- Inseam measurement
- West belt check
- Front part check
- Back part check
- Bottom ham check
- Spot check
- Quality controller pass sticker.
- Thread cutting
- Size sort out on size table
- Shade table quality check
- Shade label cut
- Different tag attach
- Ratio check: Here check labels size and tag size are same or not.
- Metal check by metal detector
- Hanger adjust
- Dust wash by gum tape
- Folding the garments
- Garments input into pole bag
- Accessories audit
- Cartoon pack
- Accessories audit
- Cartoon pack

Packing:
Packing department is the most important part of finishing section. So accurate arranging of packing is most essential for any finishing section. The basic layout of packing department like as-
- Shade checking on shade table.
- O. Label check
- Hand tag/price ticket
- Ratio check
- Hanger attach
- Metal detector pass.
- Drawstring accurately adjust
- Dust clean
- Folding
- Ratio for assort.
- Garments enter into pole bag
- Label on cartoon/ Cartoon mark.
- Cartooning garments
- Cartoon lock
- Cartoon assembling according to color, size, and number.
- Cartoon shipping mark attaches.
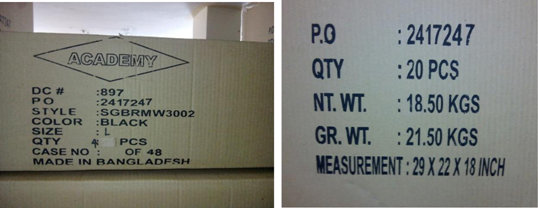
Cartoon sticker:
It means description on cartoon shows different information about cartoon. GAP shipping mark print on cartoon H&M attach sticker on cartoon. The information like that-
- Symbol A for Assort packing,
- Symbol S for Solid packing.
- Address – Order no.
- Color no. – Assort (Ratio)
- Size (Solid) – Quantity
- Total cartoon – Cartoon no.
- H&M country flag – H&M Price ticket (for solid not assort).
Shipment:
After the final inspection, garments are shipped by sea. Sometimes garments are shipped by air if the lead time is limited or loss of production.
Ref.: Photo source : https://www.pexels.com


This blog post beautifully demystifies the intricate process behind garment production, offering a clear and insightful overview of the factory operations that ensure the creation of high-quality apparel. From the initial stages of fabric and accessory procurement to the meticulous inspection and marker making, each step is crucial in delivering a well-crafted final product.
thanks
Pingback: What does Trim Card mean ? - Textile Research and Development
Really impressive article on garment manufacturing. Keep it up.